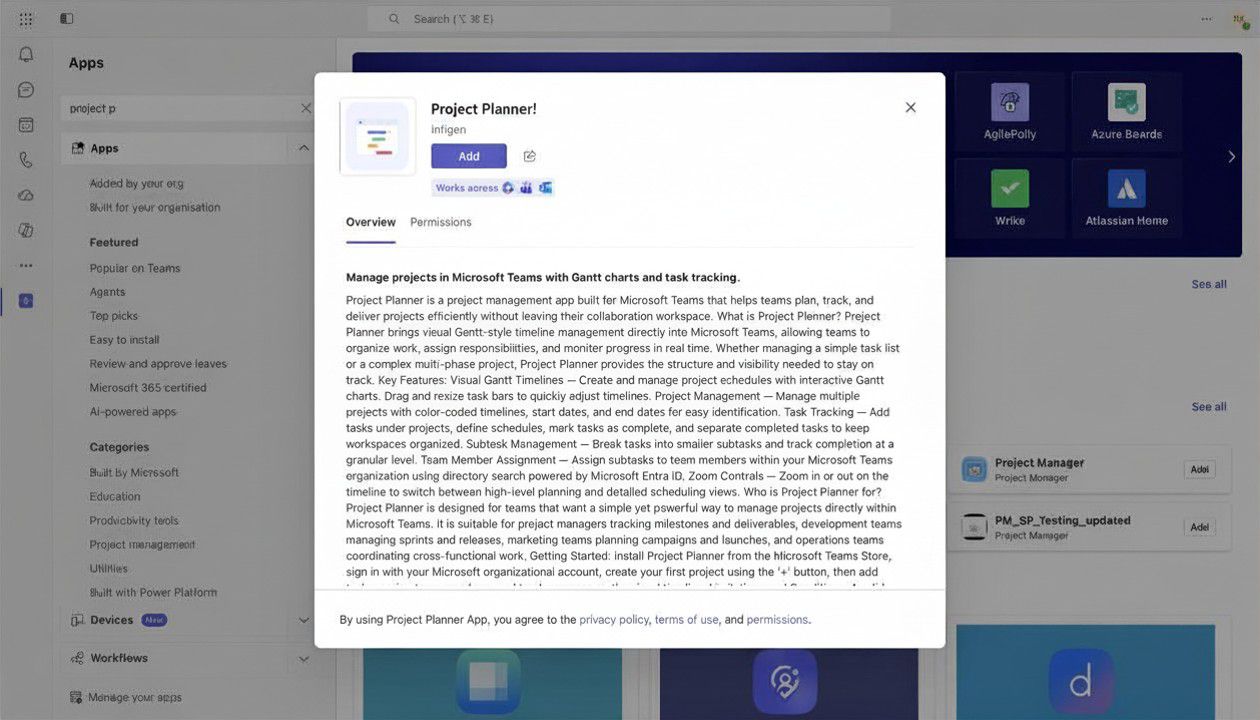
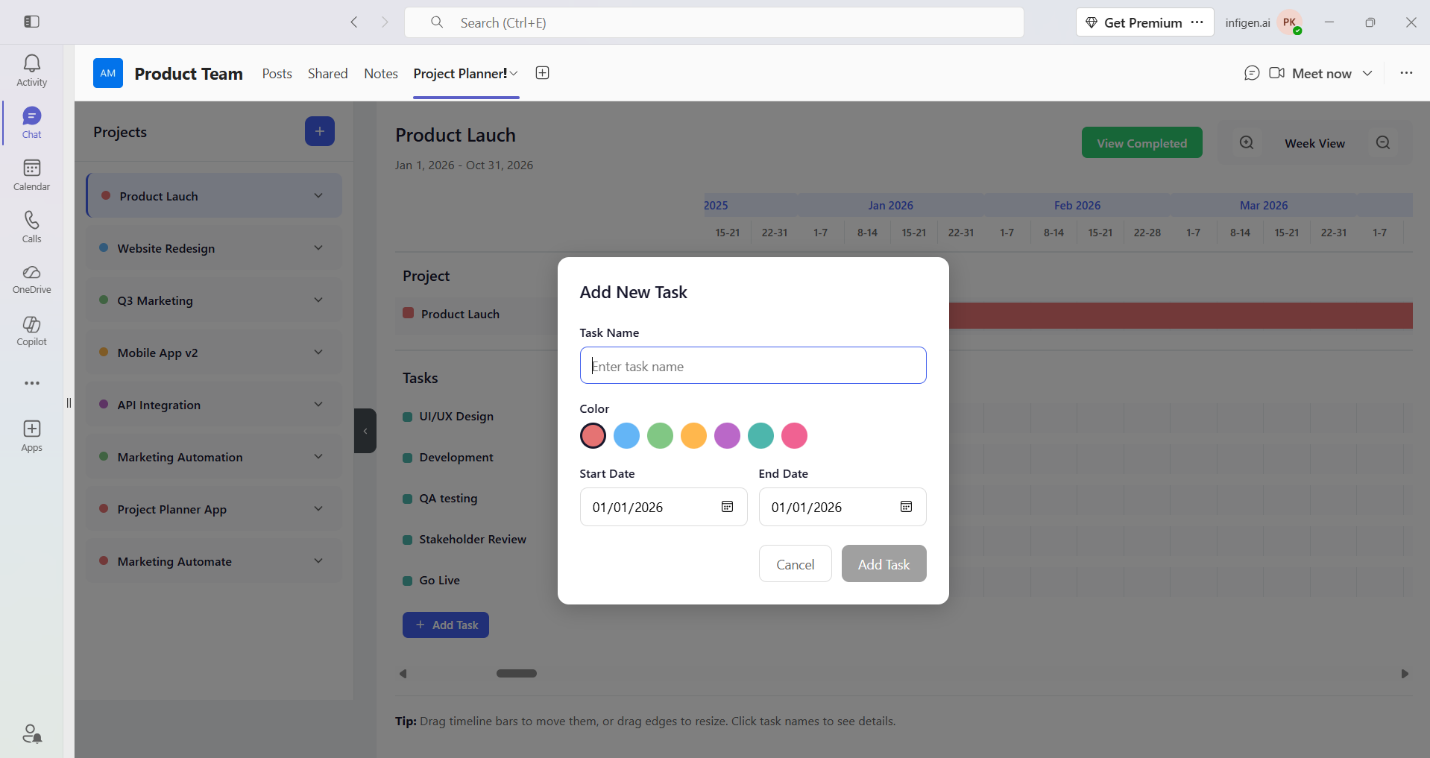
Click Add to bring Project Planner! into Teams
Open the Microsoft Teams app store, find Project Planner! and click the Add button on its listing. This launches the Teams add-app flow and takes you directly into the setup experience.
A step-by-step walkthrough for installing the app inside Microsoft Teams, configuring your first plan, and creating the projects and tasks that bring your timeline to life.
Open the Microsoft Teams app store, find Project Planner! and click the Add button on its listing. This launches the Teams add-app flow and takes you directly into the setup experience.
After clicking Add, a dialog appears asking "How would you like to use this app today?". Select a channel or chat where you want Project Planner! to live, then click Go to confirm.
Want a second planner in the same channel? Press the + (plus) button in the channel's tab bar to add a new tab, then add Project Planner! again. Each tab holds a completely independent planner.
Once inside the Project Planner! tab, you'll see a Projects sidebar on the left. Click the + (plus) button at the top-right of that sidebar to start creating a new project.
Clicking + opens the Add New Project dialog. Fill in the project name, pick a colour, and set start and end dates. When you're ready, click Add Project to save — it appears immediately in the sidebar and on the timeline.
With a project selected, click the + Add Task button on the timeline view. A pop-up appears where you can enter the task name, pick a colour, and set the start and end dates. Click Add Task to save.